Hosting a NestJS App on CPanel
This is a tutorial on how to host an NestJS app on a CPanel instance.
-
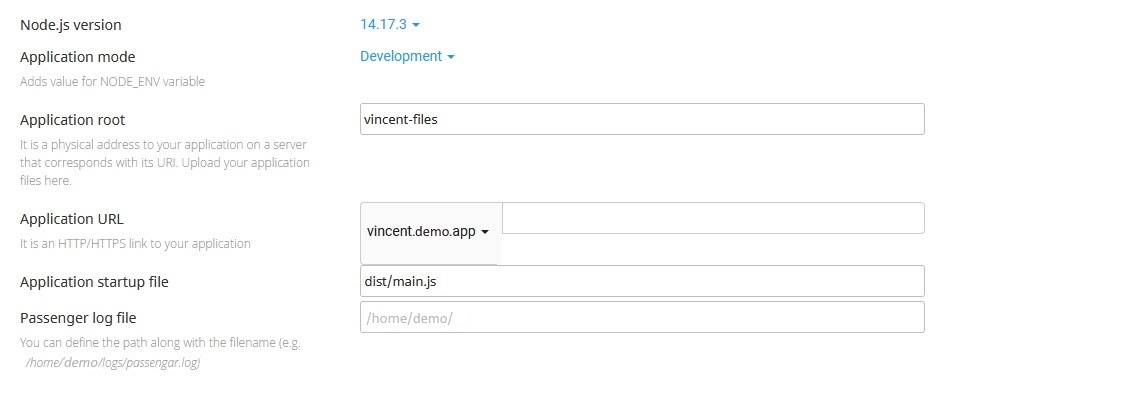
Setup Node.JS App
- CPanel Menu -> Setup Node.JS App -> Create Application

We use the Node.JS App Setup on CPanel because NestJS is a framework for Node.js, so the deployment process is the same. After creating a node.js application, a directory is autogenerated in your CPanel filesystem with the name of your application root. This is the folder we will be putting our server files into.
-
Compile Website Files
- Terminal -> run ‘npm run build’ command inside root of project directory on your local machine.
NestJS compiles your project to a folder called ‘dist’ which is generated within the project directory. These are the compiled files we will be using to populate your node app directory.
-
Compress/Zip the contents of ‘dist’ for convenient upload to CPanel. (Or use an FTP/SSH client.)
Make sure the file type is .zip as CPanel does not recognize .7z. The reason we compress the files for upload is because CPanel cannot recognize subfolders when using the File System uploader. The ‘login’ folder in the example provided above would be ignored by the upload process. This is why I recommend a tool like WinSCP or using an SSH solution.
-
Upload compressed local ‘dist’ directory (dist.zip) to the CPanel Filesystem nodejs app directory generated in step 2.
- CPanel Menu -> File Manager -> [your node js app] directory -> Upload ‘dist.zip’
-
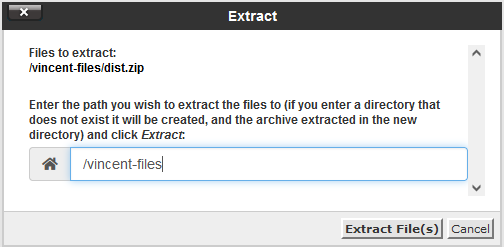
Extract the contents of your uploaded .zip file into the CPanel Filesystem ‘dist’ directory.
- CPanel Menu -> File Manager -> [your node js app] directory -> ‘dist.zip’ -> Extract

Extracting this way will extract the files into the /dist directory.
-
Upload ‘nest-cli.json’ and ‘package.json’ files from local project root directory to the CPanel Filesystem nodejs app directory generated in step 2.
- CPanel Menu -> File Manager -> [your node js app] directory -> Upload
(You can drag and drop these files, without the need to compress them into a zip folder as there are no sub-folders included).
-
Run NPM Install for Node.JS Application
- CPanel Menu -> Setup Node.Js App -> [your node js app] -> Run NPM Install

This will only be available if you followed the steps above and have correctly uploaded the package.json file in the right directory. Before starting, I recommend stopping the application if it is currently running to reduce the computing power required to run the node-modules installer. This process can take anywhere from 5-20 minutes depending on the available resources of your CPanel instance and the amount of external libraries you are using in your project.
You should now be able to navigate to the URL registered to this application.
